Concord Grapes Jam by DK on Oct 11, 2011


- Cook time:
- Prep time:
- Serves: 8+ people
- Yields: Around 5 cups
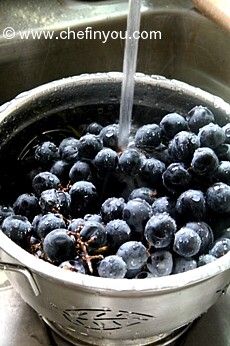
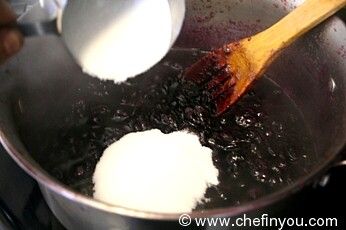
- 3 lbs ripe Concord Grapes
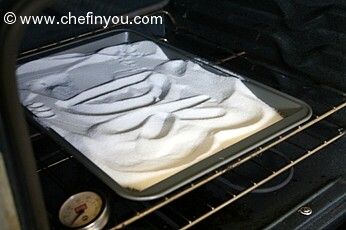
- 3 cups Sugar (see Tips)


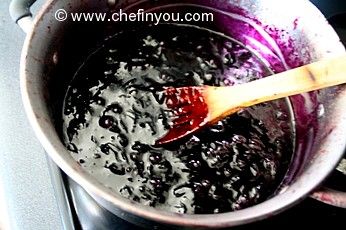
1. Temperature Test – If the temperature (using a candy thermometer) shows 220ºF (or 104ºC), then the Jam is done. Make sure that your thermometer is placed vertically and the bulb is covered with the jam. The bulb should NOT touch the bottom of the pan.
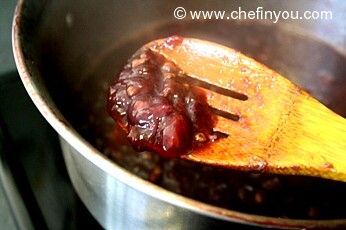
2. Spoon Test – This is similar to how you test a sugar thread consistency. Take a cool metal spoon and dip it into the boiling Jam mixture. When you life the spoon, if the Jam runs off the spoon like a syrup, then the Jam needs more cooking time. But if it is heavier and drops like slate/sheet off the spoon instead of flowing as drops, you know that the Jam is done.
3. Refrigerator Test - I mostly use this method to check the doneness of my jams. I keep a plate in the freezer and remove it when I want to test. I then pour a small amount of the boiling jelly/jam on this plate and let it sit in the fridge for few seconds. If the mixture gels /mounds and wrinkles when you push it with your finger, it's done. If runny and it does not have a body to it, then continue to cook the jam for few more minutes until it clears the nudge test.
More info in the Apricot Vanilla Jam Recipe
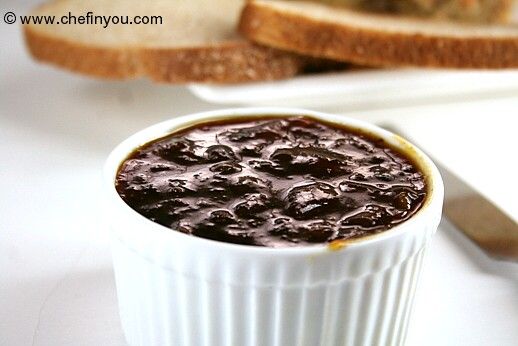
 This is the picture of my toast with Jam the next day during breakfast. See that beautiful purple color. YUM!

Filed Under these categories
- 226 American
- 291 Dairy Free
- 447 Gluten Free
- 8 Jams
- 705 Kid Friendly
- 384 Nuts Free
- 499 Vegan Recipes
Recipe Reference
Related Posts

Figs Jam By DK on Aug 1, 2012
Apricot Vanilla Jam By DK on Mar 7, 2010

Plum Jam By DK on Feb 23, 2009

Strawberry Chia Jam By DK on Jul 30, 2015

Homemade Tamarind Paste (OPOS®) By DK on Nov 8, 2017

Fig Newtons (Cookies) By DK on Aug 6, 2012
Leave a Reply
13 Member Reviews
By D Lynn on Oct 9, 2014
Huntress Heavenly CG JAM I have been making this jam for 3 or 4 years now and the only problem I have is that there is never enough. So this year I have tripled the batch and will do it twice yes it is heavenly!
The only changes I made were to use 9 lbs of grapes and 10 cups of sugar, and cook time was increased to 1.5 hours.
The grapes were measured after being washed, de-stemmed, and peeled. (this measurment includes the juice from the grapes) and 9 cups of sugar were added as the recipe calls for, when it calls for it. the tenth cup of sugar was added after an hour of cooking down. (at this point if it weren't hot one might be tempted to grab a straw. the reason for cooking down longer is because there is so much juice, but the flavor that comes from the reduction is how my jam got it's 2nd name Heavenly. Thank you DK for a great recipe!!
I processed in a pressure cooker because that is what I know, and trust.-for 15 min (but check your altitude) you can use a waterbath also. the shelf life on this from the test I did with last years batch is a year + but I can only say what I know. I had to hide a jar last year just to do the test. this is the reason for triple batches this year.
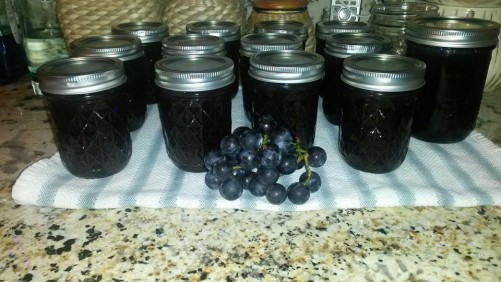
I got 7 pints, 12 half pints and 1 pint. My oldest grandson needs his own big jar lol.
Make this Jam you will be so happy you did. I am sure it will become a must have for your harvest cooking too.
By Katerin on Oct 7, 2014
 You this was so good, and fun to make
183 Comments
By Barb on Sep 4, 2019
By Connie on Oct 11, 2018
It helps to combine well with the fruit since it dissolves better :) --DK
By Maggie on Sep 25, 2018
By Steve on Sep 18, 2018
By Teresa on Sep 12, 2018
By Eb Mac on Sep 1, 2018
By Douglas on Feb 6, 2018
By Dina on Dec 11, 2017
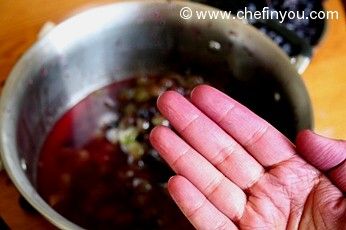
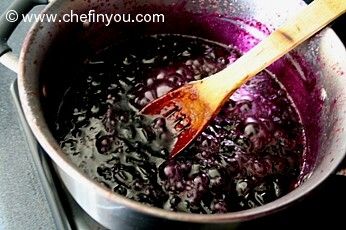
I don't Dina. The liquid is from the juice of the grapes themselves. --DK
By Karen Kehler on Oct 13, 2017
I am glad it worked out for you Karen. Thank you :) --DK
By Eleisha on Oct 1, 2017
By Laurie on Sep 28, 2017
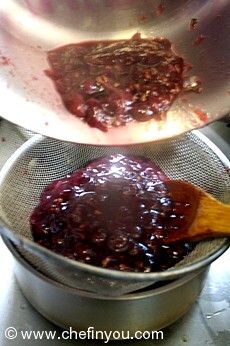
The chunks are pretty soft enough to kinda melt in your mouth. But there are skins giving it a preserve like consistency instead of a smooth jam. If you think that would bother you enough to take away the joy, I would def suggest the immersion blender. --DK
By Laura on Sep 18, 2017
By Rose on Sep 15, 2017
Oh definitely yes! --DK
By Brenda on Sep 6, 2017
By Kathleen Chester on Aug 17, 2017
Thank you so much Kathleen Chester :) --DK
By Denise Gingerich on Aug 13, 2017
This recipe makes around 5 cups of Jam. So may be about 2.5 pints? :) --DK
By CYNTHIA on Jul 31, 2017
For it to melt better and combine well Cynthia. --DK
By Amanda on Oct 8, 2016
By blaine on Sep 22, 2016
By Val on Sep 12, 2016
By Anna on Sep 3, 2016
By Belva on Aug 20, 2016
By Patrick on Jun 14, 2016
By Christine on Mar 22, 2016
By frances Van den Bergh on Mar 15, 2016
Nothing beats nostalgia and I am so glad I was able to bring those though this :) --DK
By Jenn on Nov 1, 2015
By Sunny on Oct 22, 2015
By Agnes on Oct 16, 2015
By Ceci on Oct 10, 2015
By Deb on Oct 6, 2015
By Marie on Oct 3, 2015
By Juli on Oct 1, 2015
By Pat on Oct 1, 2015
By Karen Karsseboom on Sep 30, 2015
By Beth on Sep 24, 2015
By Maey on Sep 21, 2015
By pat on Sep 20, 2015
By Danielle on Sep 19, 2015
By Dorothy Hammond on Sep 16, 2015
By Melissa on Sep 16, 2015
By Amanda on Sep 13, 2015
By Janelle Holsing on Sep 8, 2015
By Karen Quibell on Sep 2, 2015
By Tamara on Aug 28, 2015
Canning would make sure it lasts for months, even a year. If not, I find that it lasts me upto even 2 months. I have used it within that time, so not sure otherwise. –DK
By Biscuits, Mimosas and World Peace | A Chicken Wish on Apr 6, 2015
By Gissel on Feb 23, 2015
By Michelle on Oct 17, 2014
By Stu Borken on Oct 15, 2014
By Sean on Oct 15, 2014
By Ruth on Oct 14, 2014
By Michelle on Oct 12, 2014
By Gene on Oct 12, 2014
By Bert on Oct 10, 2014
By Isabelle on Oct 10, 2014
By D Lynn on Oct 9, 2014
By Alexis on Oct 5, 2014
By eleanor on Oct 1, 2014
By Stu Borken on Sep 30, 2014
By Christine Walter on Sep 30, 2014
By Bert on Sep 30, 2014
By Alex on Sep 30, 2014
By Richard Crossley on Sep 29, 2014
By Dan on Sep 28, 2014
By Cheri on Sep 28, 2014
By Barb on Sep 27, 2014
By Linda on Sep 27, 2014
By Stu Borken on Sep 27, 2014
By Lisa on Sep 26, 2014
By Stu Borken on Sep 25, 2014
By Marilyn W on Sep 25, 2014
By Emily on Sep 25, 2014
By Fran on Sep 24, 2014
By Lisa on Sep 24, 2014
By Stu Borken on Sep 24, 2014
By Lisa on Sep 24, 2014
By Stu Borken on Sep 23, 2014
By Lisa on Sep 23, 2014
By Stu Borken on Sep 23, 2014
By Lisa on Sep 23, 2014
By carol on Sep 23, 2014
By carol on Sep 23, 2014
By Jonathan on Sep 22, 2014
By Stu Borken on Sep 21, 2014
By Salina E on Sep 21, 2014
By Bert Rutherford on Sep 18, 2014
By Lisa on Sep 17, 2014
By Bonnie on Sep 12, 2014
By Bonnie on Sep 12, 2014
By 5 Concord Grape Recipes | Kaylee Eylander DIY | Kaylee Eylander DIY on Sep 9, 2014
By Amanda on Sep 8, 2014
By Cindy on Aug 31, 2014
By Kim on Aug 26, 2014
By Jonathan on Aug 24, 2014
By Stephanie on Aug 22, 2014
By Diane on Aug 20, 2014
By Jodi-CLT NC on Aug 17, 2014
By Sarah D on Jul 13, 2014
By Kate Cox on Apr 30, 2014
I am so glad to hear it worked out great for you. Thank you for the feedback :) --DK
By Grape Jam | Life's A Hoot on Apr 11, 2014
By Tracey on Mar 8, 2014
By Paul and Laura on Jan 4, 2014
By Simon and Jane on Nov 5, 2013
By Anita on Oct 23, 2013
By Anita on Oct 23, 2013
By patricia on Oct 22, 2013
By Fun with Grapes | Hills and Tails on Oct 17, 2013
By Sabrina on Oct 14, 2013
By Bev on Oct 14, 2013
By pamela on Oct 13, 2013
By Robyn on Oct 6, 2013
By John-Eddie on Oct 5, 2013
By Megan on Oct 4, 2013
By Jessica H on Oct 2, 2013
By Laura on Oct 2, 2013
By Megan on Oct 1, 2013
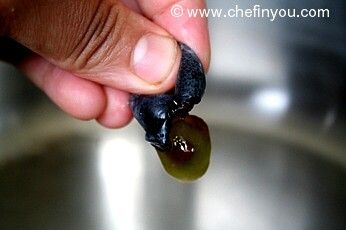
Nope, I didn't. It just juice of the grapes while I was squeezing out the skin. :) --DK
By JBowers on Sep 28, 2013
By Mary Whalen on Sep 26, 2013
By Sirena on Sep 26, 2013
By Randy on Sep 23, 2013
By Janet on Sep 21, 2013
By Genevieve Bowen on Sep 20, 2013
By Maria on Sep 20, 2013
By Anita on Sep 19, 2013
By Maria Kis on Sep 15, 2013
By Carla on Sep 14, 2013
By Patricia on Sep 13, 2013
By Lisa Boyle on Sep 12, 2013
By nickel on Sep 11, 2013
By Concord Grape Recipes — Eat Well 101 on Sep 11, 2013
By Julie on Sep 9, 2013
By Bernadette on Sep 8, 2013
By Maria Kis on Sep 6, 2013
By Donna M. Mitchell on Sep 2, 2013
By Tammie Sizemore on Aug 31, 2013
By Maharoon on Aug 27, 2013
By Teia on Aug 26, 2013
By Nonnie on Aug 18, 2013
By joyce on Aug 12, 2013
By Lisa on Aug 8, 2013
By Shaista on Aug 3, 2013
By JWhitten on Aug 1, 2013
By The Tin Man on Jul 16, 2013
By Marlene S on Jul 1, 2013
By Marlene S on Jul 1, 2013
By Jean Besseling on Jun 27, 2013
By Heather on Apr 16, 2013
By das_archana@yahoo.com on Apr 14, 2013
Awe..I am so lucky to have such a reader to give me feedback. Thank you so much :) --DK
By Lori on Apr 13, 2013
By Lori on Apr 13, 2013
By Margaret Loiterton on Feb 24, 2013
By lynda dean on Feb 5, 2013
aah. I am so jealous! Grapes right from the vine...how fresh can this jam get! --DK
By karen on Dec 15, 2012
By katrina on Nov 8, 2012
By katrina on Nov 8, 2012
By Fresh Concord Grape Jam « recipeyum on Nov 4, 2012
By D. Lynn on Oct 14, 2012
I am so glad you liked it. This jam has become a fav in our house and I made them last week what with so many concord grapes making their way at my Farmer's market. :) --DK
By We Jam | Feather By Feather on Oct 5, 2012
By Kim on Oct 1, 2012
By thatwoman on Sep 16, 2012
By Mayorfoghorn on Sep 14, 2012
By shannon on Sep 11, 2012
By andria on Sep 7, 2012
By Lisa on Sep 7, 2012
By Lovefood on Sep 6, 2012
By Stacey on Sep 2, 2012
By Roxanne on Aug 30, 2012
By Angela on Aug 26, 2012
By Angela on Aug 26, 2012
By Ernie on Aug 13, 2012
By cheruba on Mar 1, 2012
By leelakanthi on Jan 5, 2012
By Charu on Dec 31, 2011
By Maria on Oct 14, 2011
By Cynthia on Oct 14, 2011
By Maria on Oct 14, 2011
Here is an interesting article on storage of Jams. Hope this is useful - http://www.uga.edu/nchfp/how/can_07/storing_jams.html
By Shirley on Sep 24, 2019