Kushboo Idli / Mallige / Malligai Poo idli by DK on Apr 16, 2020

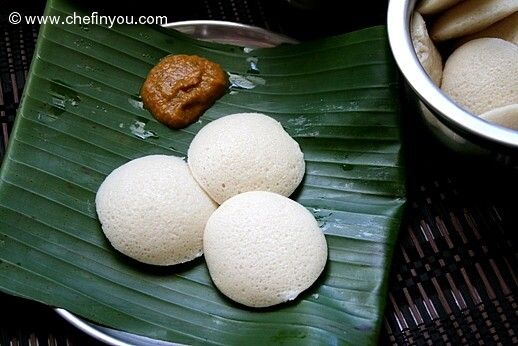
When you have a population of a billion plus, you know there is no dearth to variety and variations to recipes. And if that's not enough, throw in creativity and the number explodes exponentially. Take the classic South Indian breakfast - Idlis for example. A quick glance around the internet, you will end up with at least 10 different recipes and 50 other variations that can do done with idlis. Indians are passionate foodies for a good reason. Today's post is a gem amidst such droolworthy numbers. This uber soft and spongy idli is aptly named - Malligai Poo (Indian Jasmine) more for the way it looks than its aroma (which by the way is A.M.A.Z.I.N.G). Some ingenious person decided to re market this idli as Kushboo idli, after a very popular south Indian actress Kushboo, since they both shared the traits of being very white and plump. The feminist groups were clearly missing those days and this was accepted as a compliment :)

Idlis are best served hot and eaten as soon as they are made since the more it sits, harder it gets. But this version stays soft for a long time. The addition of Sabudana/Sago pearls to the regular Idli recipe does this magic. It makes for a very smooth and velvety batter that's fluffy to touch. The proportions vary with households and the manner of making divert a bit as well. Today's version is from my recipe notes that I wrote down a couple of years ago. Normally I am good with noting down the source but I seem to have misplaced for this one. Searching around the net did not give me a clue since this one is pretty unique with its proportions. If you are aware, please let me know and I will see if I can jog my memory.
A well fermented batter is a beauty to watch. That typical yeasty aroma is treasured and I couldnt help sharing that in today's post! Yes - I add salt after fermenting if you were wondering. More on that in the steps.
- Cook time:
- Prep time:
- Yields: Around 50 idlis (will depend on your idli mould)
Ingredients
- 1 cup Idli (parboiled) Rice
- 1 cup Raw Rice
- 1 cup Urad Gota (skinned whole Urad dal)
- 1 cup Sabudana/Sago (Javvarisi)
- Salt to taste
Method
1.
Put everything together and give it a good wash.
Tips: Some versions include adding few fenugreek seeds. If you want to, add around 1/4 tsp fenugreek seeds as well. Some versions include few castor beans thats soaked as well and then ground into the batter. If castor beans are not available a few tsps of castor oil is added to the ground batter. This supposedly adds to the softness. I did not do any of these.
Tips: Some versions include adding few fenugreek seeds. If you want to, add around 1/4 tsp fenugreek seeds as well. Some versions include few castor beans thats soaked as well and then ground into the batter. If castor beans are not available a few tsps of castor oil is added to the ground batter. This supposedly adds to the softness. I did not do any of these.

2.
Soak them together in lots of water overnight. This picture is after soaking for about 9 hours.

3.
Next grind them together in a wet grinder. If you don't have one, you can use a mixie. Make sure to use a small amount at a time and use cold ice water to grind the batter. You dont want the mixie getting too hot.

4.
Make sure to grind it little thicker and to a very silky smooth consistency.

5.
When you see air bubbles in your ground batter, you know its ground well - esp the urad dal. Normally this is where you would add salt and give it a good mix. But salt is an yeast inhibitor. In a humid place, it make sense since you don't want the batter to rise too much. But in a cold/dry climate, we want the yeast to work at its best and hence I add salt only after fermentation.

6.
I heat the oven for few minutes, switch it off, turn on the light and leave my batter there to ferment for around 10 hours. My kitchen is on the cooler side and hence I find this method works the best for me. Depending on your climate/temperature you might take less/more time for it to ferment.

7.
A well risen and fermented batter the next day.

8.
As explained earlier, I add salt now. I add about 4 heaped tsp of himalayan pink salt and give it a good mix. I posted the video earlier in the post.

9.
Ladle this batter to your idli mould.
Tips:You can remove small amount of batter (that you would be using) and add a pinch of baking soda to enable it to rise even more while steaming. I usually skip it.
Tips:You can remove small amount of batter (that you would be using) and add a pinch of baking soda to enable it to rise even more while steaming. I usually skip it.

10.
Steam them around 8-10 minutes until the toothpick in the center comes out clean.

11.
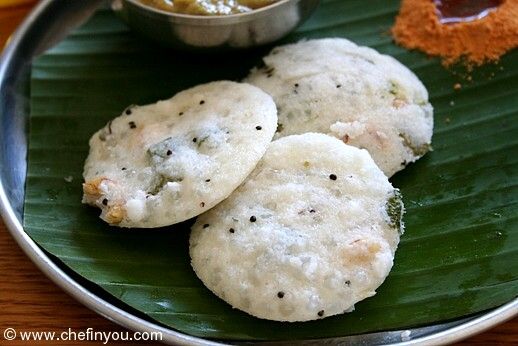
I have heard that making it the traditional way of using a cloth gives better results and tried it with a cheesecloth.

12.
While I did not find much difference texture wise, it sure made bigger sized idlis. :)

Enjoy these luscious beauties warm along with any spicy dish - sambar, onion chutney, tomato chutney, coconut chutney and/or Idli podi!

Filed Under these categories
- 28 Breakfast
- 291 Dairy Free
- 447 Gluten Free
- 45 Indian Breakfast Recipes
- 705 Kid Friendly
- 25 Kids Breakfast Recipes
- 384 Nuts Free
- 227 Picnic
- 192 Potluck
- 398 Pregnancy
- 177 Sugar Free
- 499 Vegan Recipes
Ideal Accompaniments

Coconut Chutney (for Idli, Dosa) By DK on Feb 27, 2014
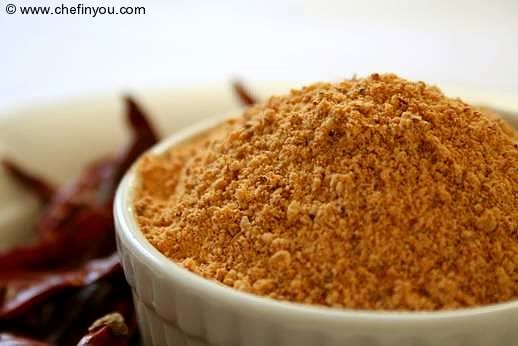
Spiced Chutney Powder / Idli powder By DK on May 18, 2009
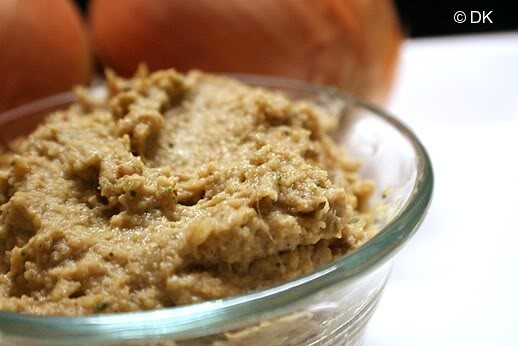
South Indian Onion Chutney By DK on Nov 6, 2008
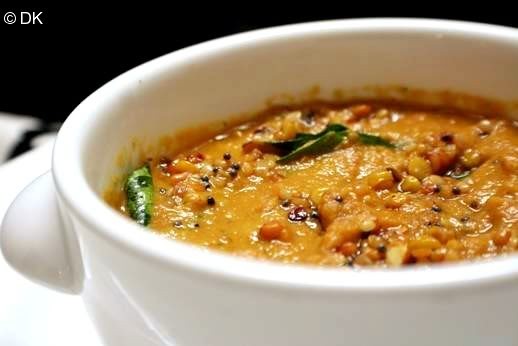
Tomato Chutney – South Indian Style By DK on Nov 4, 2008
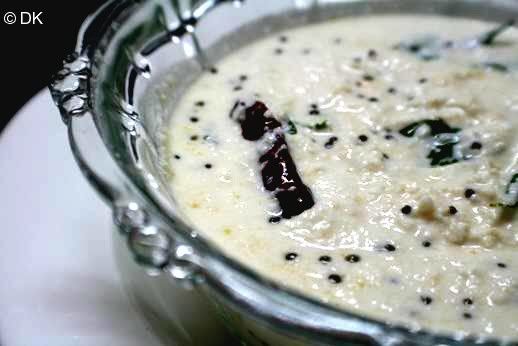
Coconut chutney (Kobbari Pacchadi) By DK on Nov 2, 2008
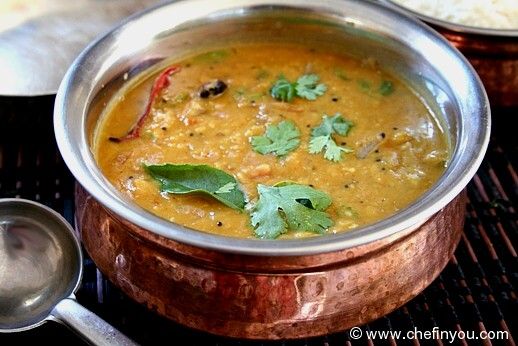
South Indian Sambar By DK on Aug 8, 2012
Related FAQs
- How to ferment idli batter in winter?
- Why are my idlis yellow in color?
- Why are my idlis hard and rubbery?
- Why are my idlis flat?
- Why is my Idli sticky?
- why is my idli batter not fermenting?
- How to make soft Idlis?
- Are dosas paleo?
- Are dosas gluten free?
- Are dosas vegan?
- Why is my dosa batter not fermenting?
- Why does my dosa stick to the pan?
- Why is my dosa cracking?
Recipe Reference
My Recipe Notes (misplaced original source)
Related Posts

Thayir Idli (Spiced Yogurt with Leftover Idly) By DK on Sep 29, 2016
Sabudana (Sago) Idli By DK on Mar 5, 2012
South Indian Idlis By DK on Jan 26, 2009
Idli Upma By DK on Jan 23, 2012
Coconut Chutney (for Idli, Dosa) By DK on Feb 27, 2014

Idli Finger Fries By DK on Dec 22, 2011
Leave a Reply
I love to hear from you! I read each and every comment, and will get
back as soon as I am able to.
2 Comments
By Pavani on Apr 18, 2020
Such soft, fluffy idli. I've heard about Kushboo idli but didn't know how to make them. Sago in an interesting addition to the batter - will try this out some time.
By Hema on Oct 14, 2020