Karuppu Ulundhu Dosai (Whole Black Gram Dosa) by DK on Mar 20, 2016

Every South Indian fridge or oven would in 99% of the cases hold a vessel full of fermented batter, either ready to go or in a state of fermenting. In today's modern society when every health magazine is screaming Fermentation and Probiotics as the elixir for good health, I cannot help but feel proud of where I come from. My childhood meals were full of Idli's and Dosas that's traditionally made using a fermented batter of rice and lentils. And our meals were never complete without homemade yogurt which we all know is chockful of probiotics.

There are variety of ways to make dosa and this version comes from Tirunelveli / Thoothukudi District in Tamil Nadu, India. Traditionally, in this method, only whole Black Urad dal is used. Only the rice is soaked while the Black Gram lentil is first pounded in a Aatu Kal (a contraption made with stone for pounding grains) into flour and set aside. Then the rice is pounded into a batter and then this flour is added to make these pancakes/crepes. Dry grinding of these lentils in my current day electric wet grinder freaks me out imagining the noise pollution and hence I prefer the soaking method. I am also partial to soaking my whole foods since it aids in better digestion and absorption of nutrients.
- Cook time:
- Prep time:
- Yields: Around 25-35 dosas depending on the size/thickness.
Ingredients
- 3 cups Parboiled Rice (Idli Rice)
- 1 cup Whole Black Gram (Karuppu Ulundhu)
- 2 tsp Fenugreek Seeds (Methi/Vendhayam)
- 4 tsp Sea Salt, or to taste
Method
1.
Take everything except the salt in a bowl. We are using the Urad that is whole and is not husked.

2.
Fill it with water until comfortably covers them, overnight. The below picture is from the next day morning where it has soaked up much of the water.

3.
Add all this together to a wet grinder. You can use a mixie/ processor but personally a wet grinder is just perfect for dosas and idlis.

4.
As mentioned earlier in the post, the black gram was not soaked traditionally and just ground into flour first. It was set aside and the rice was ground into a batter. Then the flour was added. But I prefer soaking my whole foods first and hence this method of soaking them all and then grinding them together appeals to me.

5.
I use the soaking water to grind the water.

6.
You might need more or less, enough to make a smooth batter that's thick with buttermilk consistency.

7.
Pour this into a big vessel which provides height for the batter to rise up while fermenting.

8.
Add the required salt

9.
and give it a good mix. I personally prefer using hands (traditionally used as well) where the belief is that the body heat aids in the fermentation process.

10.
Set aside in a warm place covered with a lid (not air tight).

11.
Depending on your region and humidity level, it might roughly take anywhere between 6-24 hours.

12.
See how it has risen and almost doubled? That's a well fermented batter. This would provide a wonderfully porous dosa.

13.
Mix it well and then store in a air tight vessel of your choice in a refrigerator. Bring it to room temperature when ready to make the dosas. I love using a cast iron skillet for dosas and keep one specially for making them. Heat a pan well until it sizzles when drops of water is added to the pan. Lower the heat and lightly grease the pan with sesame oil (traditionally used) using a paper towel or a half cut onion. But you can use any oil of your choice. Pour a ladle of batter

14.
and quickly spread it in a circular motion to the desired thickness. Increase the heat back to med-high. A thick spread would make for a soft pillowy dosa.

15.
You can drizzle few drops of oil if you like around the dosa. Wait for few minutes or until the bottom gets browned and you are able to easily lift the sides with a spatula.

16.
Turn the other sides and cook for another couple of minutes, or until done.

17.
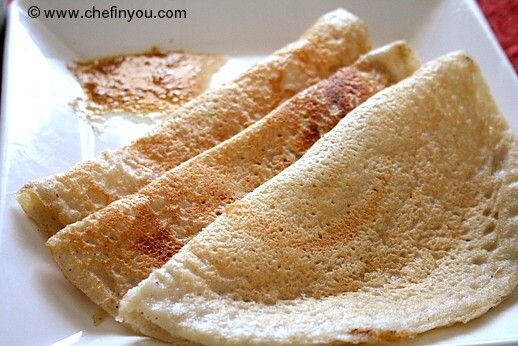
Here, I have spread the batter thin, almost like a crepe. This makes for a crispy dosa and is mostly preferred in our house.

18.
Turn the other side for few seconds and remove to a plate. While making thin dosa, cooking just one side is mostly enough.

Dosas are best when eaten as soon as they are out of skillet. My husband prefers this way when it's piping hot, while I don't mind waiting for few minutes! Its tastes rubbery when cold. Try it along with any spicy chutney of your choice. We also love it with Milaga Podi/ Gunpowder/ Idli Chutney Powder

Filed Under these categories
- 28 Breakfast
- 12 Crepes
- 291 Dairy Free
- 14 Dosas and Idlis
- 14 Easy Bread and Crepes Recipes
- 447 Gluten Free
- 45 Indian Breakfast Recipes
- 705 Kid Friendly
- 25 Kids Breakfast Recipes
- 55 Kids Main Course Recipes
- 384 Nuts Free
- 398 Pregnancy
- 224 Protein Rich
- 177 Sugar Free
- 499 Vegan Recipes
- 113 Wholegrain
Ideal Accompaniments
Tomato Chutney – South Indian Style By DK on Nov 4, 2008
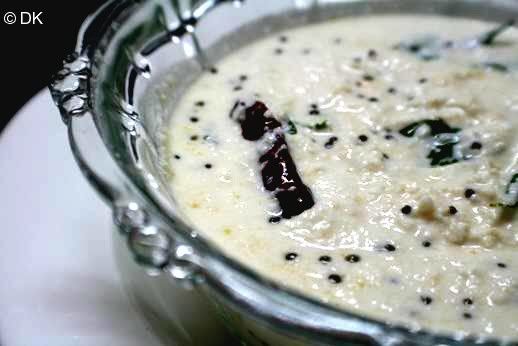
Coconut chutney (Kobbari Pacchadi) By DK on Nov 2, 2008
Related FAQs
Related Articles
Recipe Reference
Dosaikal.com introduced me to this dosa and I have made very minor as suitable to my preferances.
Related Posts
Carrot Oats Dosa By DK on Jun 4, 2018
Thalippu Dosai (Tadka Dosa) By DK on Apr 2, 2018
Sada Dosa (Plain South Indian Crepe) By DK on Mar 19, 2010
Egg Dosa with Quinoa By DK on Mar 18, 2014
Vendakkai Dosa (Okra/Lady’s Finger Crepes) By DK on Oct 21, 2015
Murungai Keerai Dosai (Drumsticks Leaves Black Gram Dosa) By DK on Aug 20, 2016
Leave a Reply
I love to hear from you! I read each and every comment, and will get
back as soon as I am able to.
7 Comments
By anonymous on Mar 18, 2017
Good to use whole grain Urad dal. You may also try using whole grain brown or red rice.
Blessings.
Yes, you sure can. --DK
By Vikas on Jun 11, 2016
Thank you so much for this lovely recipe, I'm gonna surely try this.
By Vaishal on May 4, 2016
Nice Recipe!
By harun on Apr 12, 2016
Dosa is my favourite thanks for posting the recipe to learn many people
By No Idea on Apr 1, 2016
Pardon my ignorance but the recipe states 'parboiled rice'. Does that mean I soak the raw (uncooked) rice with the methi seeds and black gram or do I soak cooked rice?
Indian parboiled rice would be otherwise called idli rice. Look for it at an Indian grocery store. --DK
By geetha on Mar 20, 2016
Hi, Your dosas look lovely !I generally use mixie for grinding the batter,but I was presented with Ultra recently.There were no instructions.Can you please give some hints as to how to grind,using ultra?I love your recipes.Thank you.


By Sushmitha Ganesh on Mar 26, 2019
Our ancestors got so many things right! This blogging journey has helped me a great deal in finding these gems :). --DK