Colocasia/Seppankilangu Roast (Low calorie) by DK on Apr 25, 2010
 Recipe")
 Recipe")
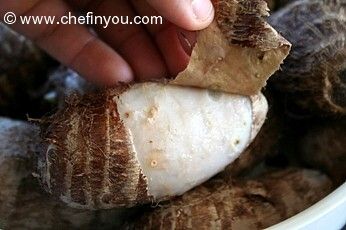
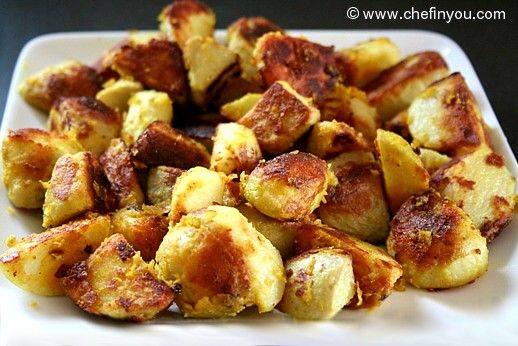
 Recipe") The measurements are approximate and highly taste buds based. Add as much chilli powder you want! ;) Get wild with the recipe. And yes! My mom never slices the Taro root - she keeps them whole to make those fries and we (which is to say my sis and I) used to call it "mutton chops" and irritate my mom! She will then refuse to eat it after we call it that! ;) We were OK to call it with whatever name as long as someone actually did not make us eat real mutton chops.;)
The measurements are approximate and highly taste buds based. Add as much chilli powder you want! ;) Get wild with the recipe. And yes! My mom never slices the Taro root - she keeps them whole to make those fries and we (which is to say my sis and I) used to call it "mutton chops" and irritate my mom! She will then refuse to eat it after we call it that! ;) We were OK to call it with whatever name as long as someone actually did not make us eat real mutton chops.;) - Cook time:
- Prep time:
- Serves: 3 people
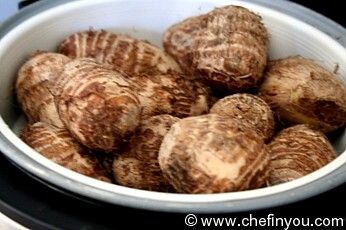
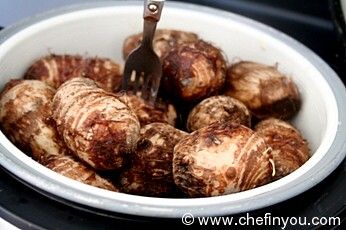
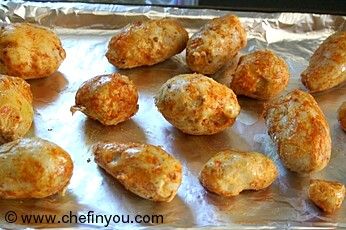
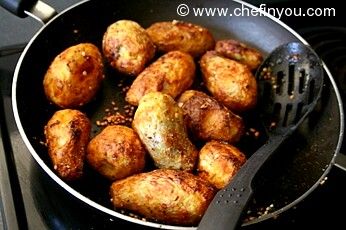
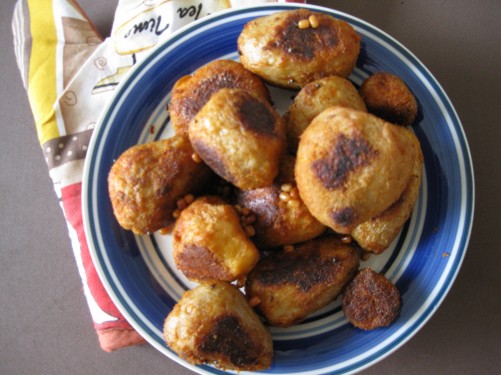
- About 12-14 Taro Root (small ones not the BIG gargantuan sized Chinese ones!)
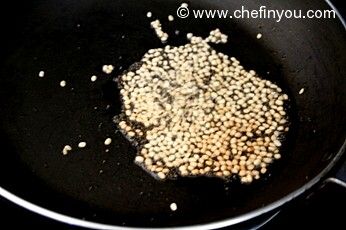
- 1/2 tsp mustard seeds
- 1/2 tsp split black gram (urad dal)
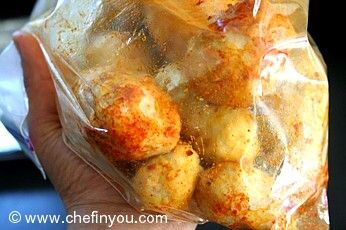
- 1 tsp chilli powder (or as per taste)
- 1/4 tsp turmeric powder
- salt to taste
- about 3 tsp vegetable oil
 Recipe")
Filed Under these categories
- 366 Cuisine
- 52 Curries
- 46 Easy Side Dishes
- 447 Gluten Free
- 77 Healthy Baking
- 206 Healthy Foods
- 180 Indian Recipes
- 705 Kid Friendly
- 336 Main Course
- 12 Miscellaneous
- 100 Side dishes
- 499 Vegan Recipes
Ideal Accompaniments

6 min Mor Kulambu (OPOS©) By DK on Sep 4, 2018
Related Posts
Seppankilangu Varuval (Colocasia/Taro Root Roast) By DK on May 19, 2012

Chipotle Style Roasted Chili Corn Salsa Recipe By DK on Aug 28, 2016

Low fat Marble Chocolate Cheesecake By DK on Feb 5, 2010

Roasted Jalapeno Soup By DK on Jan 24, 2014

Roasted Pumpkin Pie with Chocolate Crust By DK on Nov 18, 2014
Low Calorie Appam By DK on Dec 10, 2008
Leave a Reply
2 Member Reviews
By swetha on Jan 6, 2012
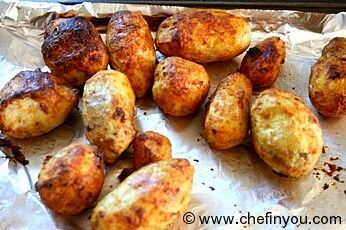
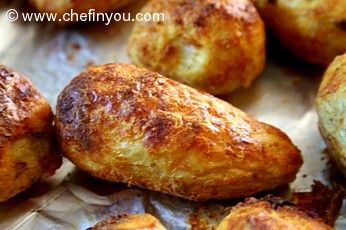
It came out great. The texture was perfect, crunchy on oustide and well cooked on inside - all this with only 2 Tbsp oil. Bravo to 'Chef in You' for a great recipe and great step-by-step instructions.
By Dolly on May 18, 2010
When I read the recipe Taro root low calorie, I felt like flying in the air.
Also realized how much I am missing my Mom's cooking . Though I cook many things here, always think of the mom's cooking. I totally agree with DK, that what ever we cook we will lack in a small point which is "Mom's touch".
I did this last week for Lunch. My Hubby was soooooooooooo happy. He loved it. It was little crisp on outside and soft inside.
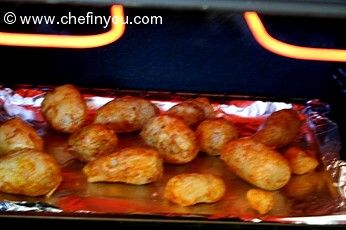
Since I don't know about Broiler cooking, I kept this cooked Colocasia in the oven @ 400 oF for 20 min for roasting. It came out good.
Thanks Dhiviya 
29 Comments
By AJM on Jan 20, 2014
By The Ninth Day of Christmas – Fried Chicken | Seasonally Vegan on Jan 9, 2014
By Tina on Apr 9, 2012
By Ladi on Jan 14, 2012
By Human Lover on Dec 28, 2011
LOL Human Lover :) Woke up on the wrong side of the bed did we? :) One thing I agree is about many "Vegetarians" all over the world (read "all over the world" - NOT Indians alone) harp about the superiority about being Vegetarians or in some cases Vegans. But I would ask you to rethink about generalizing your notion to all non meat eaters. My sentence was so harmless its very funny that you would choose to harp about it and read much much more than it deserves. It was mere statement to show my preference not necessarily advocating anything else. Take a chill pill! :)
By Taro Root Substitute | Laatuasunnot on Feb 18, 2015