6 minute OPOS Pav Bhaji by DK on Feb 18, 2018


- Cook time:
- Prep time:
- Serves: 2-3 people
- Yields: Around 2 cups
- 2 tbsp Butter
- 1 tbsp Oil
- 1/2 cup finely chopped Onion
- 1/2 cup chopped Tomato
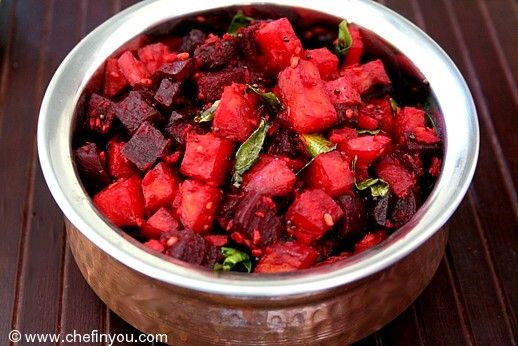
- 1 cup small dice Potato
- 1/2 cup grated/shredded Cauliflower
- 1/2 cup grated/shredded Cabbage
- 1/2 cup finely chopped Capsicum/Bell Pepper
- 1/4 cup grated red Beetroot
- 1/4 cup frozen Green Peas
- 1/2 tsp Kashmiri Chilli Powder, or to taste
- 1 tsp >OPOS Ginger Garlic Paste
- 1/2 tsp Kasuri Methi (Dried Fenugreek Leaves), crushed
- 1/4 tsp Turmeric
- 1-2 tbsp Pav Bhaji Masala, or to taste
- Salt to taste
- Freshly squeezed Lemon Juice, to taste
- 3-4 tbsp finely chopped Cilantro, to garnish
- Sides
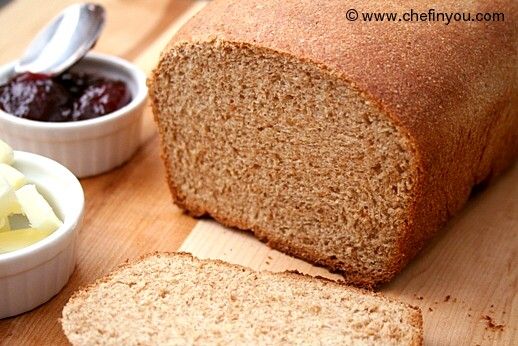
- 4-6 Pavs
- 1-2 tbsp Butter for topping (optional)
1. Butter: You can use Vegan Butter or simply additional neutral flavored oil.
2. Bread: Opt for wheat free rolls, either homemade or store bought to make this Gluten Free . A wheat free bread that you normally would eat for toast also works.


Note: If it does not in another minute or so, check if steam is leaking out the sides of your lid. That means gasket is at fault. In that case switch off the cooker and open the lid. If cooked, proceed with Step 12. Otherwise, add some (1-2 tbsp ) water, stretch your gasket and place it again for 1 Whistle.


Filed Under these categories
- 52 Curries
- 291 Dairy Free
- 46 Easy Side Dishes
- 447 Gluten Free
- 705 Kid Friendly
- 55 Kids Main Course Recipes
- 384 Nuts Free
- 163 One Dish Dinners
- 8 OPOS Main Dishes
- 7 OPOS Side Dishes
- 100 Side dishes
- 5 Stews
- 177 Sugar Free
- 330 Super Bowl
- 42 Under 15 minute - Side Dishes
- 499 Vegan Recipes
Ideal Accompaniments
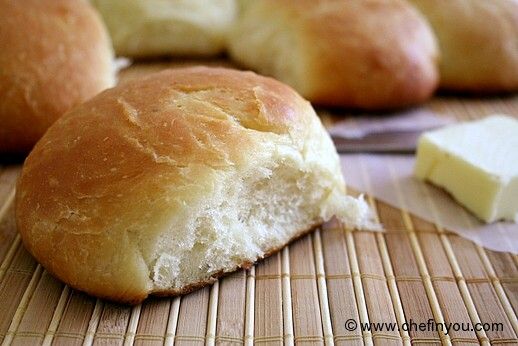
White Dinner Rolls (Indian Pav) By DK on Dec 20, 2009
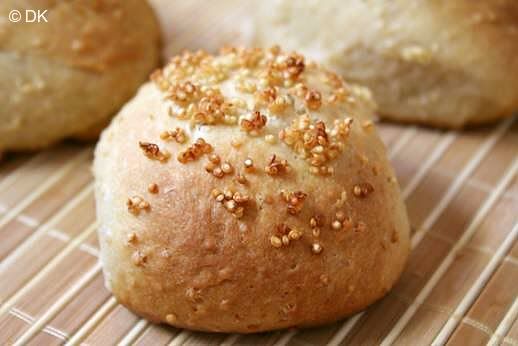
Quinoa Dinner Rolls By DK on Apr 1, 2009
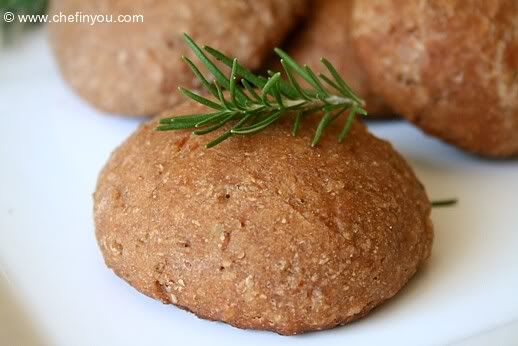
Bulgur Wheat Dinner Rolls By DK on Aug 5, 2009
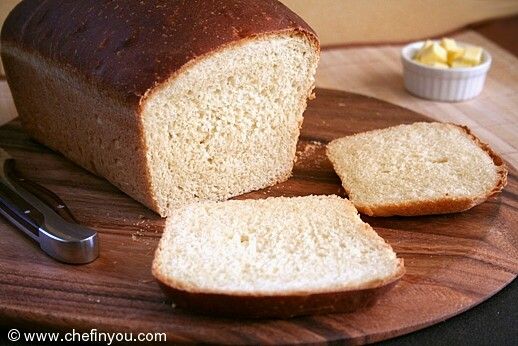
American (White) Sandwich Bread By DK on Aug 27, 2012
Graham Honey Bread By DK on Sep 3, 2011
Related FAQs
Recipe Reference
Related Posts

Pav Bhaji Fondue By DK on Apr 1, 2015

Beet Hummus By DK on May 23, 2008
White Dinner Rolls (Indian Pav) By DK on Dec 20, 2009

Egg Bhurji Pav By DK on Feb 23, 2015
South Indian Beetroot Curry with Red & Golden Beets By DK on Apr 22, 2012

Slow Cooker Dal Makhani By DK on Nov 17, 2016
Leave a Reply
12 Comments
By Kamna on Aug 23, 2020
Cabbage should not be the problem. What was the timing? Was the charring on the sides or bottom? --DK
By BJ on Jul 4, 2020
So happy to hear your feedback BJ. Appreciate it :)--DK
By Anjali on May 26, 2020
Just use whatever you have after the onion/tomato layer. It acts as the buffer to prevent burning. --DK
By bkl on Mar 28, 2020
Never had that issue in all my 2+ years of OPOS cooking. --DK
By Rashmi on Sep 17, 2019
By Suriya on Feb 19, 2019
Don't have any favourite brand as such. You can use whatever you prefer. --DK
By Nutan on Jan 18, 2019
I use US cup which is 240ml. --DK
By Bharati Adhyapak on Oct 8, 2018
Will look forward to it Bharati :) --DK
By Cressida on Jul 30, 2018
YAY - that's a fabulous choice. I love me some hot spicy pav bhaji on a winter/rainy day as well with "buttered" pav :p. Thanks for leaving me a feedback Cressida. Appreciate it :) --DK
By Neha on Mar 9, 2018
Only 2 tbsp of water (step 1). Thats about it. The flavor is intense this way and you get the complete goodness of the veggies in their full glory :) If you want to add water for consistency, add some warm water after its cooked. If such less water worries you about burning, then add 1/4 cup at the onset and when comfortable slowly reduce the amount after few trials. --DK
By Siri on Feb 20, 2018
:) <3 --DK
By Devi on Dec 28, 2020